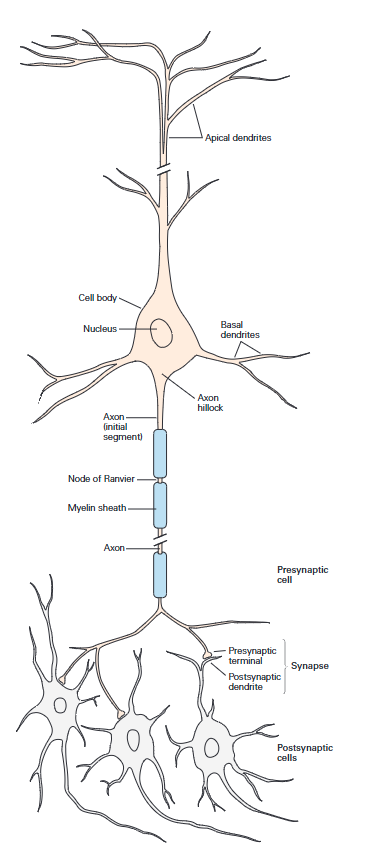
The NeuronLab Simulator
The NeuronLab simulator only runs under Windows and runs best with a large monitor (or, better yet, two). Two monitors give the user 'elbow' room to build the neuron and explore its operations.Google Search of SETI Net
The Neuron Lab Simulator is built on a simple but powerful truth: neurons are understandable because their signals are ionic, and ions carry charge. That charge allows neural activity to be measured. From those measurements come our models of membrane resistance, capacitance, threshold, conduction, and synaptic action. What would otherwise be hidden inside microscopic living cells becomes accessible through its electrical effects. In that sense, charged ions gave neuroscience its experimental foothold. They made the living neuron visible not only as a structure, but as a functioning system.
The NeuronLab Simulator was explicitly developed to learn by doing. It allows you to create a custom neuron to your specifications with as little effort as possible. With it, you can drag and drop neuron components on your computer screen, connect them, and see them in action.
Using the NeuronLab Simulator is straightforward. Simply left-click near either end of a body part to wire up the components and construct a functioning Neuron. As you add parts to the body plan, their names will automatically appear in the connection list to the left, eliminating the need for manual tracking. This list can be ignored for the most part.
Download and install instructions
The simulator is for Windows 64 bit systems only and is under constant revision so check in often.
To Download the NeuronLab simulator Click on the latest version below.Questions - Comments eMail Me - I will respond..
[ Make sure to refresh your browser for the latest version ] [ Make sure to refresh your browser for the latest version ]Setup_NeuronLab_Simulator_64bit_Ver_3.2.7.1094.exe
If your using the MS Edge browser you will see:
 Chose Save
then you will see:
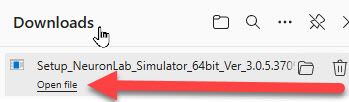 Chose Open file
After installation, the simulator will automatically start and may be used directly. You can find the simulator from the Windows START menu under NeuronLab [Hint: using all the default setting works best].
Questions, Comments , Death Threats? eMail Me - I will respond..
Body Plan Screen
After download and installation, the Simulator Body Plan work area will look something like this. You may stretch this screen to fit your computer display.

The body parts available are shown in the right panel. The number available of each type is indicated in square brackets. The left panel shows the connection lists. You can shut off the connection list from the top menu | Setup | Show Grid
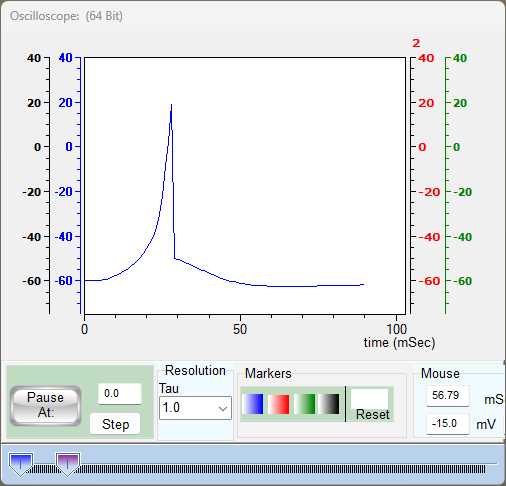
Oscilloscope
An oscilloscope is provided for examining the inner workings of the neuron. It will look something like this.
The body components available from the right side of the main screen are:
| Step Functions - Generate a current spike to start the operation | 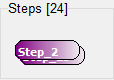 |
| Synapse Compartments - This body part contains logic for some of the simulation tasks. |  |
| Dendrite Compartments - Compartments of dendrite that can be joined together to form a dendrite tree |  |
| Soma - Quadratic Integrate and fire based on the Izhikevich neurons |  |
| Axon Compartments - String Axon compartments together for the complete axon. |  |
| Scope Probes - Allows you to connect at various points and view the results |  |
Using the NeuronLab Simulator - first time
Move Components - Drag and drop a Step and a Scope probe as in this picture. Any step and any scope they are all the same.
Wiring Components - LEFT click near the edge of the two components to connect them as shown. Notice that their names appear in the Connection List. The simulator will bitch at you if you try to connect components that are not logical or have no biological equivalent. For example:
- You cannot connect anything to the input of a Step or the Output side of a Scope
- You cannot connect the output of a Soma to a Dendrite. That doesn't happen in nature.
Saving the Plan - You can save this setup from the top menu on the Body Plan (Body Plan | Save Plan). It will be saved on your machine under the file name you chose. You can reload it anytime from Body Plan | Load Plan. If you get tangled up, you can reset the whole thing from Body Plan | Clear. This will give you a clean start.
Scope Range - You should see the step function on the scope. Slide the two thumbs left and right until you get the portion of the trace you are interested in.
Connect List - This table shows the current set of connections. You can dismiss this through the menu Setup | Show Grid
Setting Step and Scope Parameters
Right click on the Step and then right click on the 'Scope probe. You should get something like this:

Step Params
This allows you to specify the amount of current (picoAmps) to be delivered and the start/stop time (mS). This is a constant current generator that adjusts the voltage delivered to the connected body part depending in its input resistance of the body part it is driving.
From the top menu you can shut off the step, disconnect it from the web of body parts or dock it in the reserve. The menu is common in all body parts.
Scope Params
Unset the Output Enable and observe how the 'Scope shuts off and the 'Scope probe changes to a neutral color, serving as a reminder that it is off. Dismiss the Params box by clicking on the body of the Scope probe or the 'X' of the parameter display. Press the Dock button and see how the Scope returns to the right side and the trace shuts off, all with a single action.